
Comparisons (#7, 8)
Clip Art
Slide # 7: School
Go to INSERT > Pictures...

...choose Online Pictures

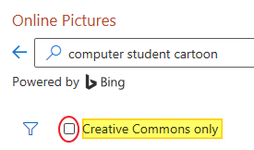
Type in something to search for and [Enter] to search

Uncheck the creative commons box
Then go to Filter > Transparent (for our project we want all our clip art to have transparent backgrounds).


Select a picture (or you can select several and delete the ones you don't like), and Insert.

Resize and position the picture to fit in the empty area beside/below the left list.

Click off your picture so it's not selected.

Text box came with the picture?

- If it does, delete the text box (click on the border and Delete), OR
- CTRL+Z and try inserting another picture, this time make sure to uncheck the "Creative commons only" box.

Now repeat the process for your Don't Like list.
Go to Insert > Pictures > Online Pictures again

- This time search for something in your Don't Like list
- Select a picture and Insert
- Resize and position it to fill up the empty area beside/below the right list

Slide #8
- Go to Insert > Pictures > Online Pictures
- Search for something in your Like list; Filter by Transparent and uncheck Creative Commons box.
- Insert a picture
- Resize/move it to fill beside/below the left list
Repeat these steps for something in your Don't Like list.
So whatever topic your slide is focusing on, it'll be like one of the examples below.


So you should still only have a total of 9 slides...

