Design
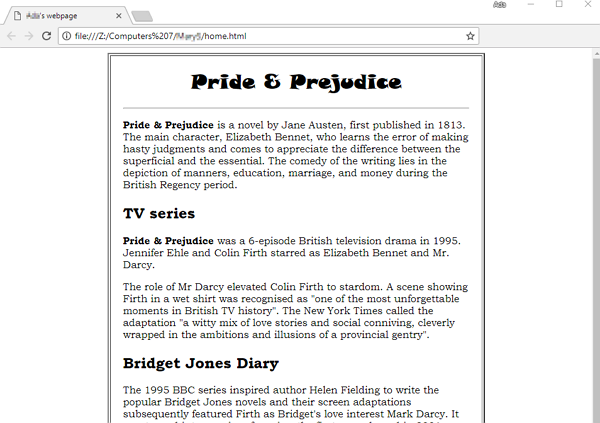
After following the instructions below step-by-step, your webpage should look more like this:
- not going across the entire browser width
- in the center of your browser
- with a border and some space between the text and the border
- a separating line after the page heading
- page heading a thicker font type
- page text not the default font type
Table
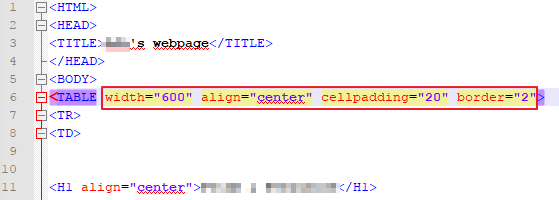
After the BODY tag at the top of your page, add the following tags: TABLE, TR and TD...
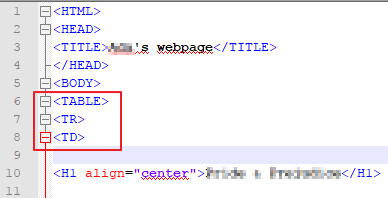
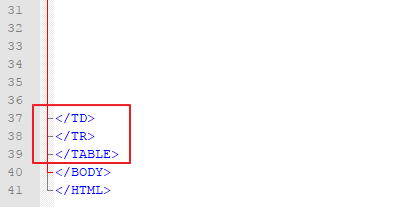
Then go down to the bottom of your code and add the closing tags for them. Add a few Enters before so you won't accidentally delete them later.
We want to give the table a fixed width of 600 pixels, so inside the opening TABLE tag, add width="600". We'll center the table in the browser by adding align="center". Also add a margin (cellpadding) and give it a small border.
Fonts
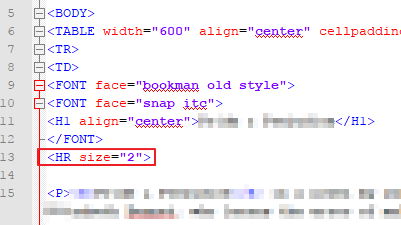
Add a FONT tag after the BODY tag with the face attribute. Copy and paste it. Add the closing FONT tag after the H1 is closed.
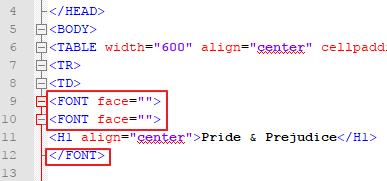
Then select a font from the following lists, and copy (CTRL+C) them, pasting them inside the quotation marks (CTRL+V).

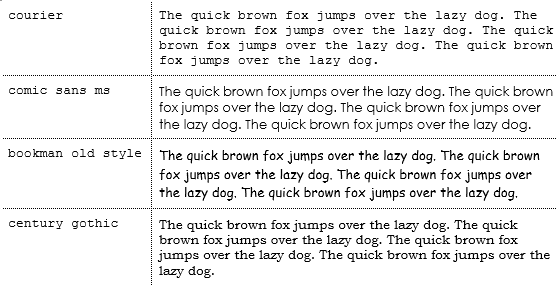
Page Fonts
- courier
- comic sans ms
- bookman old style
- century gothic
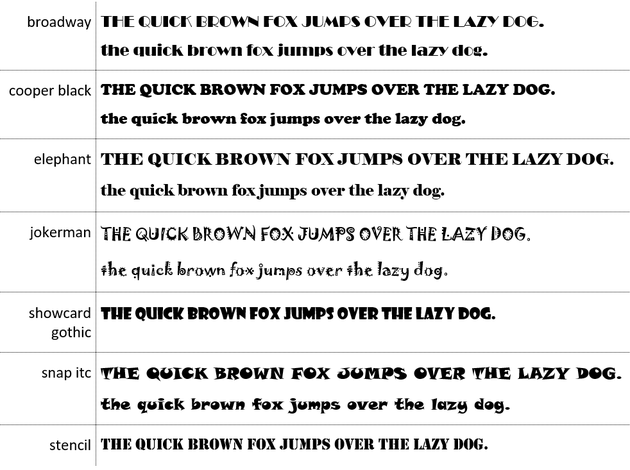
Heading Fonts
- broadway
- cooper black
- elephant
- jokerman
- showcard gothic
- snap itc
- stencil
You should see your page heading and the text being different. If not, check the spelling of the font type.
Separating Line
Add an HR tag under the H1 closing FONT tag. Then set the size to 2 to start.